Gazebos are a wonderful addition to any park or garden area. One of the main features is their ability to offer shade and shelter from various weather conditions.
However, these characteristics can only be made possible if the gazebo is sturdy and stable. In this case, they require a really strong foundation. Here, I have created a easy guide on how to level gazebo on sloped concrete?
You may have found the prime location for your new gazebo, but how would you install it somewhere where an existing sloped concrete footing is already in place? There are a couple of different options, which include installing pillars, shortening posts or even adding a deck, but we’ll get to that shortly.

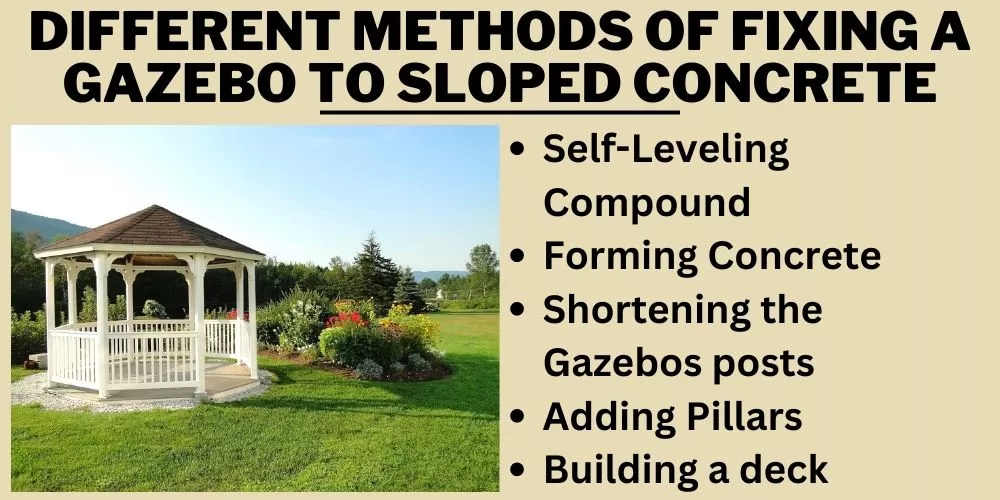
How To Level Gazebo On Sloped Concrete: 5 Methods
Gazebos need to be level to ensure that they are at full strength. Additionally, It will enable them to survive any twisting or warping they may succumb to over their time standing in position. If a structure such as this has no other option than to be built on a slope, then there are a few methods you can use to help to level them out. These include:
1. Self-Leveling Compound
Self leveling compounds such as resins or concrete do exactly as their name suggests. They level out any concrete without the need to do anything else. However, they are more suited to lesser angled slopes. They can generally handle building a base of around 5-6 mm per layer.
Some compounds can be built thicker, so it’s always best to check the manufacturer’s instructions. The compound weakens as you add layers, so they are only beneficial in smaller amounts. Tilers or stonelayers commonly use these compounds.
What you will need:
- Broom
- Forming timber
- Stakes
- Spirit Level
- Diluted PVA adhesive mix/acrylic primer (sealant)
- Paint Brush
- Self Leveling Compound
- 2-3 builders’ buckets
- Spiral Mixer
- Trowel
- Measuring Tape
- Hammer and Nails or Screws and Screw Gun
- Handsaw or Electric Cut Off Saw
- Straight Edge to Suit Dimensions of Foundation
- Brackets or Stirrups for fixing
The process:
- Prepare the existing concrete by giving it a good sweep to remove all dust and debris. Any remnants will restrict the compound’s ability to bond.
- Use the spirit level to check the sloping measurement. Leave one end on the high side and measure the difference between the bottom of the spirit level and the lower side concrete. This will give you a rough measurement which you can use to decide the type of compound you’ll use. Some only fill 5-6 mm. Others can fill up to around 30-40mm. If the distance spans longer than the spirit level, use a long straight edge to reach the overall measurement.
- Measure the lengths of each side of the box in an area you wish to level.
- Cut forming timber to length.
- Screw or nail in each corner.
- Make sure that the formed area is level and straight.
- Hammer some stakes in to support the timber from bowing.
- Apply sealant according to manufacturer’s recommendations with a paintbrush.
- Allow drying
- Calculate the thickness of the compound. Eg, 3 m (length) x 4 m (width) = 12m2. So the average thickness is 3 mm.
- Refer to manufacturers’ guidelines on how much to use. A 25 kg bag usually covers 5m2 at 3 mm thick. So 12/5 = 2.4 bags (3 bags rounded up). It’s best to use 5 kg (⅕ of a bag) to 1 litre of water, so you have room to mix it in the buckets.
- Mix the compound with a spiral mixer according to instructions (a 25kg bag usually mixes with 5 litres of water).
- Once mixed, you can start pouring the concrete mix onto the low edge and use your trowel to level it out.
- Work your way up the slope and allow it to dry. If you’ve prepared the existing layer with sealant and mixed the compound correctly, the trowel marks will disappear after a few mins. Use a straight edge to finish if the area is too large to reach the inside.
- Allow drying.
- Fix the gazebo accordingly (use brackets, stirrups, etc.)
2. Forming Concrete
Easily, one of the strongest leveling methods is building a new form and filling it with concrete. It can even be done right over the top of the existing layer. This method requires a bit of extra work but is the most stable.
What you will need
- Broom
- Forming timber and ply form
- Stakes
- Spirit Level
- Diluted PVA adhesive mix/acrylic primer (sealant)
- Paint Brush
- Concrete in bag form or delivered by mixer if a decent amount is required
- Rebar (reinforced steel mesh/rods) and steel tie wire.
- Vibrating pin tool
- Trowel
- Measuring Tape
- Hammer and Nails or Screws and Screw Gun
- Handsaw or Electric Cut Off Saw
- Straight Edge to Suit Dimensions of Foundation
- Brackets or Stirrups for fixing
The process
- Sweep down the existing concrete to remove any dust and debris. These particles will reduce the sealant’s ability to bond.
- Check the sloping measurement by leaving one end of the spirit level on the high side and measure the difference between the bottom of the spirit level and the lower side concrete. You may need to use a long straight edge if the span is longer than the spirit level. This will give you a rough height difference measurement.
- Measure the lengths of each side of the area you wish to fill with concrete and level.
- Cut forming timber to length and height.
- Screw or nail in each corner.
- Make sure that the formed area is level and straight.
- Hammer some upright stakes in to support the timber from bowing.
- Apply sealant according to manufacturer’s recommendations with a paintbrush.
- Allow drying.
- Lay in the rebar and tie in any extra lengths for strengthening.
- Calculate the thickness of concrete required. E.g., multiply the length, breadth, and depth by cubic meters. So 3 m (L) x 3 m (W) x .75 m (D) = 6.75 cubic meters.
- Purchase bagged concrete or order a mixer to the truck to deliver the calculated amount.
- Mix bags accordingly, or have the truck pour the concrete.
- Use the vibrating pin to ensure all concrete is poured in tight.
- Use a trowel and a straight edge to finish.
- Allow drying.
- Fix the gazebo accordingly (use brackets, stirrups, etc.)
3. Shortening the Gazebos posts
Some gazebos come with posts which are usually set into the ground to level it. It is possible to cut the posts to length to adjust the level. The problem with this method is that you need to be extremely accurate. Furthermore, unless the posts are detachable, it’s no simple task to lift the gazebo to get in underneath to shorten the posts.
4. Adding Pillars
Another stable method of leveling a gazebo is forming pillars or concrete posts. This principle is similar to forming a concrete slab, except you’re only building up the areas to which the posts will attach.
What you will need
- Broom
- Forming timber and ply form
- Spirit Level
- Diluted PVA adhesive mix/acrylic primer (sealant)
- Paint Brush
- Concrete in bag form or delivered by mixer if a decent amount is required
- Rebar (reinforced steel mesh/rods) and steel tie wire.
- Vibrating pin tool
- Trowel
- Measuring Tape
- Hammer and Nails or Screws and Screw Gun
- Handsaw or Electric Cut Off Saw
- Straight Edge to Suit Dimensions of Foundation
- Brackets or Stirrups for fixing
The process
- Sweep existing concrete and remove dust and debris.
- Check the sloping measurement by leaving one end of the spirit level on the high side and measure the difference between the bottom of the spirit level and the lower side concrete. You may need to use a long straight edge if the span is longer than the spirit level. This will give you a rough height difference measurement.
- Use the forming timber to create boxes as molds for the pillars. 1.5 ft (L) x 1.5 ft (W) x height is ample for most gazebos.
- Screw or nail them all in place.
- Fix them to the concrete base using L-brackets or something similar.
- Make sure that the formed area is level and straight.
- Add some diagonal braces to increase support.
- Apply sealant according to manufacturer’s recommendations with a paintbrush.
- Allow drying
- Lay in the rebar cage and any extra lengths for strength.
- Calculate the thickness of concrete required. E.g., multiply the length, breadth, and depth by cubic meters. So 3 m (L) x 3 m (W) x .75 m (D) = 6.75 cubic meters.
- Purchase bagged concrete or order a mixer to the truck to deliver the calculated amount.
- Mix bags accordingly, or have the truck pour the concrete.
- Use the vibrating pin to ensure all concrete is poured in tight.
- Use a trowel to finish.
- Allow drying.
- Fix the gazebo to pillars (use brackets, stirrups, etc.)
5. Building a deck
A deck can be a great foundation, depending on the weight of the gazebo. It’s possible to build pillars and then attach the deck, which creates a level surface for the gazebo to stand on.
What you will need
- Various Lengths and Sizes of Timber (Posts, Joists, Supports, Finished Deck Materials, etc.
- Spirit Level
- Measuring Tape
- Hammer and Nails or Screws and Screw Gun
- Handsaw or Electric Cut Off Saw
- Straight Edge to Suit Dimensions of Foundation
- Brackets or Stirrups for fixing
The process
- Check the sloping measurement by leaving one end of the spirit level on the high side and measure the difference between the bottom of the spirit level and the lower side concrete. You may need to use a long straight edge if the span is longer than the spirit level. This will give you a rough height difference measurement.
- Cut some posts to roughly 1 ft above the finished height. This will assist with attaching the deck later. The weight of the gazebo will govern the number of posts.
- Use brackets or stirrups to fix the posts to the existing concrete. Check that they are level both upright, side to side and also in line with the other posts.
- Measure and cut longer lengths for the outsides.
- Screw or nail them to the posts and each other at the corners.
- By this stage, you should have a rough frame.
- Now add a series of joists at 1.5 ft apart by installing joist brackets to keep them in place.
- Finally, lay a deck in the opposite direction and screw or nail it down.
- Cut off the posts at the desired height. Also, straighten up any longer lengths along each edge, so the deck looks uniform.
- Add any bracing if required and screw or nail them all in place.
- Make sure the deck is level and straight.
- Fix the gazebo to the deck (use brackets, stirrups, etc.)
Why would you need to level a gazebo on sloped concrete?
Building a gazebo in an open area is generally the easiest way. Open spaces can often supply sufficient access for heavy machinery to get to and from the site and dig or load out if necessary.
Furthermore, each side is more easily accessible to assist in building any formwork for concrete, building a frame and then constructing the actual gazebo.
However, sometimes life just isn’t that simple. You may have purchased a property with a pre-existing concrete ramp in the area you want to put your gazebo. Or there may even be a loosely packed sloping area that requires shotcrete or concrete to stabilize it for safety purposes. In these instances, the only way to install a gazebo is by making a few adjustments.
How to level different gazebo types on sloped concrete?
Sloped concrete can be difficult to build unless you have the correct knowledge and skill. The main thing to remember is the weight of the gazebo you want to build. Additionally, creating a level foundation that can withstand the weight without any long term issues.
Let’s look at the different gazebo types and how to adjust the sloped concrete level to help ensure they are stable.
1. Portable Gazebos
Portable gazebos are generally easy to correct on a slope. They are lightweight, and the materials used in their construction are more flexible than those of traditional gazebos. As long as they are the adjustable kind, you can simply extend or retract the legs on the sloped concrete’s side to correct the gazebo’s angle.
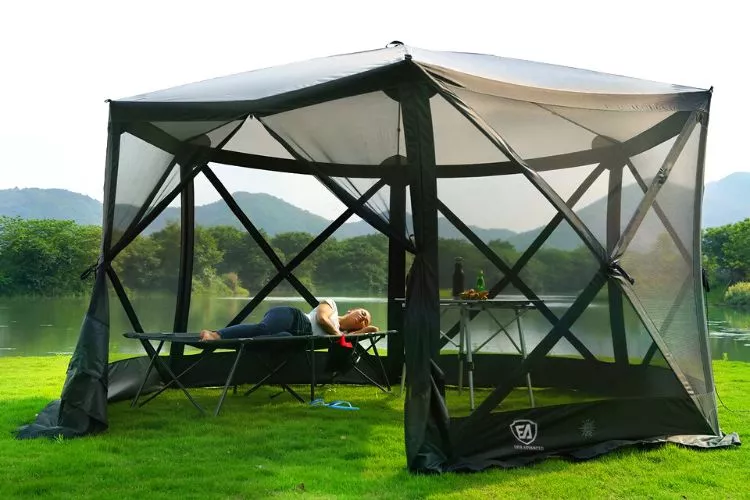
This may mean you shorten the legs further up the slope. This type of adjustment should only be performed on a moderately sloping hill. Gazebos are designed to be erected on flat surfaces. However, some models have little tolerance for angles if need be.
2. Traditional Constructed Gazebo
Traditionally constructed gazebos are completely different because they are built with stronger, heavier materials. They are constructed for longevity. Therefore, they require an extremely sturdy foundation. You can level your gazebo on a concrete slope in several ways. The most common methods are as follows:

You May Also Find Useful: Can You Put A Gazebo On Grass? | How To Secure A Gazebo From Wind On Concrete?
how to level gazebo on sloped concrete: Additional Tips
Leveling a gazebo on a sloped concrete area can be tricky if you don’t get the measurements right. However, measurements aren’t the only governing factor to a perfectly level gazebo. A couple of other important aspects need to be assessed to ensure a successful project can be completed. These include:
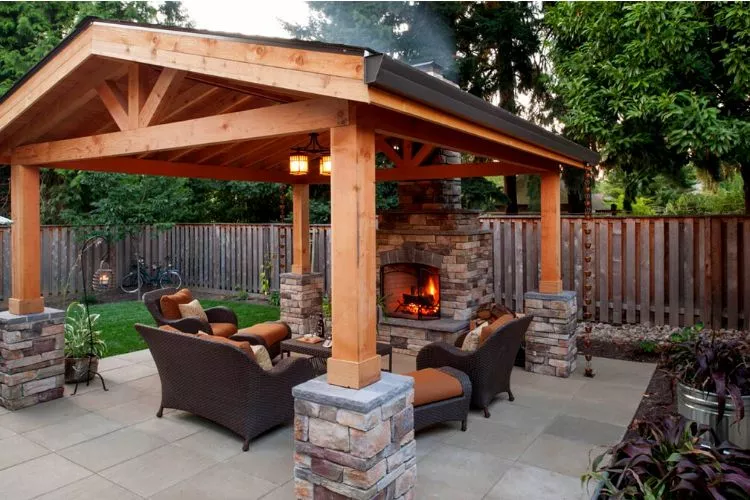
- Checking to ensure that the base is both large and strong enough to bear the weight of the structure. You should contact the manufacturer for the exact dimensions and weights. This will make building on the concrete slope a much easier task as you can build the foundations according to the right measurements
- Planning for drainage. It’s all well and good to build a beautiful gazebo, but that’s only half the battle. Having a runoff area where all the water can drain away from the gazebo is always a good idea. This may include a piping system dug into the ground and connected to a drain. The last thing you want is pooling water sitting stagnant and causing mold and rot.
- Make sure to remove any dust and debris when doing any concrete work. Sealants and primers won’t bond if smaller particles are present, so it’s always a good idea to thoroughly clean before prepping concrete with sealant/primer.
- Getting a professional to help formulate plans. In some areas, it is actually against local regulations to build freely. You’ll need a range of permits, including structural, electrical, and water.
How do you level a gazebo on a slanted patio?
Absolutely, here’s a step-by-step guide to help you level a gazebo on a slanted patio. It might seem complex, but taking it one step at a time will make the process simpler and more manageable.
Step 1: Gather necessary materials
Tools Required:
- Gazebo kit (based on your preference)
- Carpenter’s level
- Stringline
- Stakes or pegs
- Measure tape
- Drill and bits
- Shovel
- Hardware (screws/nails)
- Wooden planks or Concrete blocks (for adjustments)
Step 2: Analyze Slant and Plan Setup
The first step for the leveling of your gazebo is to understand the slant you’re dealing with. By placing a carpenter’s level on the ground, you can ascertain the severity of the slope. This will help you decide how much adjustment you need on each leg of the gazebo.
Step 3: Mark and Measure
Use stakes or pegs to play out the overall size of the gazebo. Tie a stringline between the stakes making sure level is achieved. This will help in giving the exact placement of the gazebo so that you can know where the adjustments need to be made.
Step 4: Install Gazebo Start Point
Start the installation of the gazebo from the highest point on the patio. Follow the instructions of the gazebo kit to understand the assembly process.
Step 5: Adjusting for the Slant
Adjusting the other gazebo posts to account for the slant can be done in two ways:
a) Wooden Planks – If it’s a slight slant, wooden planks of suitable thickness can be used under the gazebo’s feet. Attach the wooden planks to the gazebo’s feet using a drill and screws.
b) Concrete blocks – For a steeper slope, concrete blocks can be used. These blocks should be level and stable before placing the gazebo leg on top.
Remember to follow to keep safety first. All planks or blocks should be stable and not have a chance to slide out or collapse.
Step 6: Placing the Gazebo
Once all the feet of the gazebo are secured onto their supports whether it’s planks or blocks, position it as per the markers made in step 3. Secure all parts following the instructions given in the gazebo kit.
Step 7: Ensuring Level
Use the carpenter’s level to check the level of the gazebo from all sides. Check each post for vertical accuracy and the roof for proper horizontal level. If it’s not level, add thickness or reduce as necessary where the gazebo contacts ground.
Step 8: Final Safety Check
Conduct a thorough safety inspection once the installation is complete. Give a little shake to the structure to ensure it is firm and secure.
This detailed guide should help level your gazebo on a slanting patio. Take it slow, be precise with measurements, and always prioritize safety during execution!
Frequently Asked Questions (FAQs)
Does Gazebo need to be leveled?
Portable gazebos can generally stand up fine with a slight slope. Some models have adjustable legs that can extend or retract depending on the incline that it will be set upon. On the other hand, Permanently built gazebos need a level base to build on. Building on a slope can decrease the overall strength of the structure as well as cause potential tilting issues.
Can I use a portable gazebo on a hill?
You can use a portable gazebo on a sloping hill. Some models have adjustable legs that can extend and retract to a certain extent. However, you wouldn’t want to set up a whole campsite as it would cause issues with other equipment such as kitchens, water storage, bedding, etc. Beach use would be perfectly fine. Simply shorten the legs on the highest point.
How do you stabilize a gazebo on concrete?
There are a couple of different methods that could be used. If it was just for temporary purposes, you could add weighted items such as sandbags around the legs. Furthermore, ropes could be attached to each corner and tethered to something of weight, such as a tree, rock, furniture, etc. A permanent gazebo may require drilling into the concrete and bolting down the legs using floor to leg mounting brackets. Extra bracing or a side rail could also increase the overall stability.
What can I use to level a gazebo?
A few really solid materials can be used to build a strong, level foundation for a gazebo. These may include pavers or patio stones, concrete, self leveling compounds, decking and even compacted crushed rock.
How do you level an uneven exterior concrete slab?
One of the simplest methods to achieve an even concrete slab by using a concrete leveling compound. Preparations of the existing concrete are equally important. These may include sweeping away debris, washing with acid-based concrete cleaner, grinding the top layer, priming the concrete, and applying the self leveling compound.
Can you use self leveling on a slope?
Self leveling compounds and resins can be used to level a slope as long as the angle doesn’t exceed the measurements recommended by the product manufacturer. These products are designed to level out small blemishes but can also fill out lesser degree slopes.
Conclusion:
The most important aspect of building a gazebo is ensuring it is built on flat and level ground, hope this guide on how to level gazebo on sloped concrete helped you. This will ensure that the structure is sturdy and, more importantly, safe.
A handful of methods can help achieve this outcome; it all depends on your budget and expertise. We hope that this guide on how to level gazebo on sloped concrete has been helpful. You can read about similar topics here on our website. Check back again soon for more.

