Gazebos are more than just backyard ornaments; they’re sanctuaries, spots for reflection, and the centerpiece of many cherished memories. And like any sanctuary, it deserves the best roofing – enter cedar shingles.
Revered for their impeccable blend of durability and aesthetics, cedar shingles have long been the choice of discerning homeowners.
But, it’s not an easy task to learn how to install cedar shingles on a gazebo, and that’s why I felt the need of this article.
It’s a known fact that cedar shingles are having inherent weather-resistant qualities to ensure they stand tall against the harshest of elements, maintaining their rustic charm through the years.
However, longevity isn’t just about the material; it’s also about the craft. Improper installation can cut short the life of these beautiful shingles.
Feeling overwhelmed? Perhaps worried you might not get it right? Rest assured, you’re in the right place. This article promises to guide you through about how to install cedar shingles on a gazebo, ensuring that your gazebo not only looks picture-perfect but stands the test of time.

Benefits of using cedar shingles on a gazebo
Gazebos are undoubtedly a standout feature in any garden or outdoor space. They serve as a focal point, a place of gathering, relaxation, or even quiet contemplation.
So, when it comes to choosing the ideal roofing for such a significant structure, the stakes are high.
Cedar shingles rise gracefully to the occasion, offering a plethora of benefits that go beyond mere aesthetics. As we delve into the myriad advantages of cedar shingles for your gazebo, you’ll discover why so many homeowners and craftsmen alike favor this natural, timeless material.
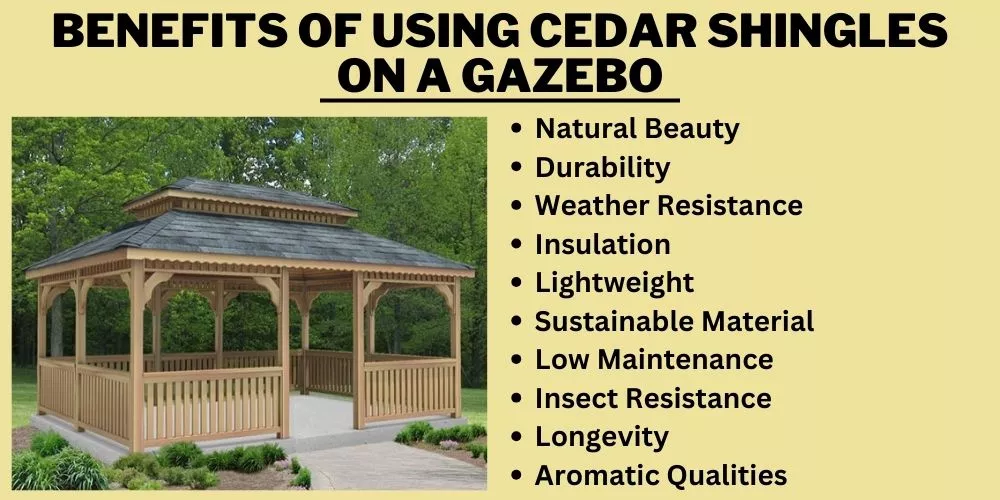
Natural Beauty
The inherent beauty of cedar shingles is hard to overlook. Their rich, warm hues, ranging from reddish-brown to soft amber, imbue a gazebo with an inviting and rustic charm.
Unlike synthetic materials, each cedar shingle possesses unique grain patterns and slight color variations, making every gazebo roof truly one-of-a-kind. The natural texture and depth of cedar add a touch of organic sophistication, effortlessly complementing various architectural styles and outdoor landscapes.
As the cedar ages, it gracefully transitions to a distinguished silvery-gray, maintaining its allure over time.
Durability
When it comes to longevity and resilience, cedar shingles are second to none. Cedar is naturally dense, imbuing the shingles with a sturdy quality that resists the wearing impacts of rain, wind, and snow. The inherent oils present in cedar serve as a natural preservative, protecting the wood from rot, decay, and damage from pesky insects.
Additionally, cedar shingles boast a unique cellular structure that provides a natural insulation, ensuring your gazebo remains a comfortable retreat regardless of the season.
With proper installation and maintenance, cedar shingles can outlast many other roofing materials, promising decades of service without compromising on appearance or function.
Weather Resistance
One of the standout qualities of cedar shingles is their innate ability to stand firm against the diverse challenges posed by Mother Nature. Be it the scorching sun of summer, the torrential downpours of spring, or the icy grips of winter, cedar remains undaunted.
The shingles naturally repel water, preventing moisture buildup and thereby warding off mold and mildew.
Moreover, cedar’s elasticity prevents it from becoming brittle in cold temperatures, allowing it to resist cracking or splitting during freeze-thaw cycles. The natural oils within cedar also act as a deterrent against pests, ensuring your gazebo’s roof remains unscathed from unwanted intruders.
All of these factors culminate in a roof that not only looks stunning but also resolutely protects what’s beneath.
Insulation
Beyond its aesthetic and durable qualities, cedar has practical benefits that enhance the usability of your gazebo. Cedar shingles have an inherent insulating property thanks to the wood’s cellular structure, providing a natural barrier to temperature extremes.
Whether you’re seeking shade from the midday sun or a cozy escape from the evening chill, a cedar-shingled gazebo offers a more temperate environment.
This insulation also means energy efficiency. If you ever plan on adding any heating or cooling elements to your gazebo, the cedar shingles work in your favor, ensuring minimal energy is lost, keeping the space comfortable while potentially saving on energy costs.
Lightweight
While cedar shingles bring a substantial list of benefits, one might assume they come with the weighty baggage of being heavy. Surprisingly, this isn’t the case. Cedar, by nature, is a lightweight wood, ensuring that your gazebo’s structural integrity remains uncompromised. This lightness doesn’t just simplify the installation process but also reduces the strain on the gazebo’s framework.
Consequently, there’s less risk of structural issues down the line, ensuring that your gazebo stands tall and proud for years to come without the need for frequent reinforcements or adjustments.
Sustainable Material
In our rapidly evolving world, sustainability is not just a buzzword; it’s a necessity. And when it comes to roofing materials, cedar shingles fit the sustainable bill perfectly. Cedar trees are a renewable resource, with responsible forestry practices ensuring that for every tree felled, several more are planted. This ensures a continual supply without depleting our precious forests.
Furthermore, cedar shingles have a longer lifespan compared to many synthetic alternatives, meaning fewer replacements and reduced waste over time. To sweeten the deal, at the end of their life, cedar shingles are biodegradable, returning to the earth and leaving minimal environmental impact.
In choosing cedar, you’re not just making a choice for a beautiful gazebo, but also casting a vote for a greener planet.
Low Maintenance
Every homeowner appreciates a feature that’s both stunning and low-fuss, and cedar shingles effortlessly check both boxes. Their natural resilience means they demand less frequent repairs or replacements.
While many roofing materials might require regular treatments or coatings to maintain their appearance and integrity, cedar’s innate properties ensure it remains hardy and attractive with minimal intervention.
Occasional cleaning to remove debris and a periodic check for any damaged shingles is typically all that’s required. This not only saves time and effort but also proves cost-effective in the long run, as you’re spared from constant upkeep expenses.
Insect Resistance
Nothing can quite dampen the charm of an outdoor retreat like a pesky insect infestation. Thankfully, cedar shingles come to the rescue with their natural insect-repelling properties.
The aromatic oils present within cedar are unappealing to many common wood pests, including termites and carpenter ants.
This natural repellency means you won’t have to resort to chemical treatments to keep these unwelcome guests at bay, ensuring your gazebo remains a safe and chemical-free sanctuary.
With cedar shingles atop, you can relish in the peace of your gazebo without the nagging worry of tiny invaders compromising its structure or aesthetic.
Longevity
When investing in any structure, especially one as cherished as a gazebo, longevity is a top priority. Cedar shingles stand out as a testament to enduring beauty and function. These shingles, when properly installed and maintained, can last decades, often outperforming many other roofing materials.
Their resistance to elements, natural preservatives, and robust structure makes them a long-lasting choice. The initial cost of cedar shingles might be higher than some alternatives, but their extended lifespan and reduced need for replacements or repairs make them a cost-effective solution in the grand scheme.
Aromatic Qualities
Beyond their visual appeal and functional benefits, cedar shingles bring a sensory delight that’s often overlooked: their aroma. Anyone who’s been near cedar knows its distinctive, pleasant scent. This aroma is not just a treat for the senses but also contributes to the overall ambiance of your outdoor space.
Sitting beneath a cedar-shingle gazebo, you’re enveloped in a gentle, woody fragrance that enhances the feeling of being connected with nature. Moreover, the scent of cedar has been said to have calming properties, turning your gazebo into a serene haven where stresses simply melt away.
How to Install Cedar Shingles on a Gazebo? (A Step By Step Guide)
So, you’ve heard about all the fantastic benefits of cedar shingles and are ready to elevate your gazebo with this timeless roofing choice. But, where to start? The beauty of cedar shingles isn’t just in their appearance but also in the relative ease with which they can be installed.
However, like any project, it requires a methodical approach to ensure success. This comprehensive step-by-step guide is tailored to empower both seasoned DIYers and those new to the world of home projects.
By the end, you’ll have the knowledge and confidence to transform your gazebo into an enduring masterpiece.
Step 1: Take Utmost Safety Precautions
Before diving headfirst into the installation process, there’s an essential step that can’t be overlooked: safety. No matter how skilled or experienced you might be, working on elevated structures like gazebos comes with its unique set of challenges and risks.
Thus, prioritizing safety ensures not just a successful project but also your well-being throughout the installation.
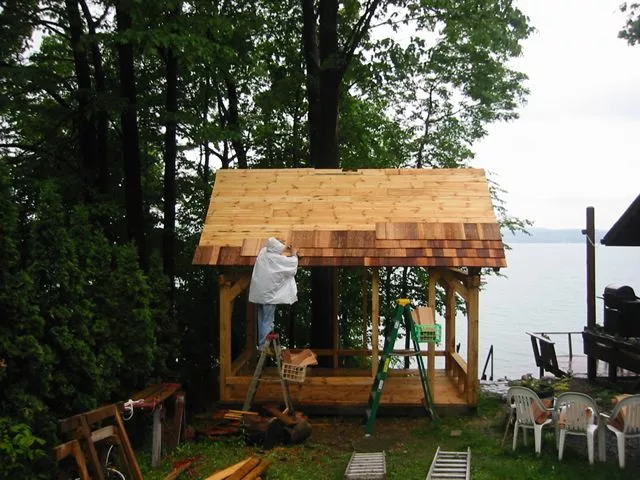
Necessary safety gear
Your first line of defense against potential mishaps is equipping yourself with the right safety gear. These are non-negotiables and should be on your checklist:
- Safety glasses: Protect your eyes from flying debris, dust, or wood splinters.
- Gloves: These provide a better grip on tools and materials while safeguarding your hands against cuts or splinters.
- Dust mask: Especially when cutting shingles, a dust mask prevents inhalation of fine particles, ensuring your respiratory health.
- Appropriate footwear: A sturdy pair of boots with non-slip soles is crucial. They offer grip, support, and protect your feet from any dropped tools or sharp objects.
Working safely at heights
Once you’re decked out in your safety gear, you’ll need to turn your attention to working safely at elevated positions. Here are a couple of critical considerations:
- Ladder safety: Always use a stable and robust ladder. Ensure it’s placed on even ground, and always maintain three points of contact (two feet and a hand, or two hands and a foot) when ascending or descending.
- Use of harnesses and fall protection: If your gazebo is particularly tall or you’re not comfortable with heights, consider using a harness. This extra layer of protection can prevent serious injuries in the unfortunate event of a fall.
Step 2: Gather Necessary Tools and Materials
The foundation of any successful DIY project lies in preparation. In the world of cedar shingle installation, this couldn’t be truer. To avoid interruptions or unnecessary delays during the process, you’ll want to ensure you have all the essential tools and materials at the ready.
After all, there’s nothing more frustrating than having to pause mid-installation to hunt down a tool or pick up additional supplies. Here’s a comprehensive list of what you’ll need:
- Cedar shingles: Ensure you choose high-quality shingles. Remember, these will be the face of your gazebo for years to come. Ensure you have extra in case of mistakes or damages.
- Roofing felt or underlayment: This acts as a protective barrier between the cedar shingles and the gazebo’s structure, ensuring moisture doesn’t seep through.
- Roofing nails or staples: Secure your shingles with these. Make sure they’re of appropriate length and corrosion-resistant, considering the outdoor exposure.
- Hammer or nail gun: Depending on your preference, a good old-fashioned hammer or a more modern nail gun will be your tool of choice for attaching the shingles.
- Circular saw or roofing shears: Essential for cutting shingles to fit the gazebo’s unique shape and dimensions.
- Measuring tape and chalk line: Precision is key. These tools will ensure your shingles are aligned correctly and provide a professional finish.
- Roofing adhesive: In areas exposed to high winds or where extra security is desired, roofing adhesive provides an added layer of shingle protection.
- Drip edge: This metal flashing prevents water from seeping under the shingles at the edges, directing it away from the gazebo’s structure.
- Ventilation system (optional): Depending on your gazebo’s design, a ventilation system may be necessary to ensure moisture doesn’t accumulate, thereby extending the life of your cedar shingles.
Step 3: The Preparation Stage
Any seasoned craftsman will tell you that preparation is half the battle. When it comes to installing cedar shingles on your gazebo, this phase is pivotal to ensure a smooth application and to prolong the life of your new roofing.
A meticulously prepared gazebo will not only make the installation process more straightforward but also ensure that your shingles remain intact, vibrant, and serviceable for years to come. Here’s how to get your gazebo ready:

Inspecting the gazebo structure
Before introducing any new materials, take a close look at the bones of your gazebo.
- Repairing any damaged wood: Over time, wood can deteriorate due to various factors, including weather, pests, or simple wear and tear. Replace or reinforce any weakened or rotted sections to provide a solid foundation for your cedar shingles.
- Ensuring proper ventilation: Check your gazebo’s existing ventilation system. Proper airflow is crucial to prevent moisture build-up, which can lead to rot or mold. If your gazebo doesn’t have adequate ventilation, consider adding vents or modifying the structure to improve airflow.
Measuring the roof
Size matters in this phase. Knowing the exact dimensions of your gazebo’s roof ensures you have an adequate supply of shingles and minimizes wastage.
Calculating shingle quantity: Measure the length and width of each roof section and compute the total square footage. Add an extra 10-15% to account for cutting, shaping, and potential errors. This will give you a ballpark figure for how many shingles you’ll need.
Cleaning the roof surface
A clean workspace is a happy workspace. Prepping the roof surface ensures the best adhesion and alignment of your cedar shingles.
- Removing debris, old shingles, and nails: Strip the gazebo roof of any existing materials, ensuring a clean slate. Sweep off any debris, leaves, or dirt that might interfere with the installation.
- Repairing any structural issues: As you clean, you might notice other structural concerns like warped wood or misaligned beams. Address these issues now for a seamless and long-lasting cedar shingle installation.
Step 4: Installing Roofing Felt/Underlayment
Now that our gazebo is prepped and ready, it’s time to roll out the red carpet—or rather, the underlayment. This crucial step is often overlooked, but it plays a pivotal role in extending the life of your cedar shingles and ensuring they remain steadfastly in place through the elements. Let’s dive into the why and how of it:
Importance of Underlayment
Underlayment, often referred to as roofing felt, acts as a secondary barrier against the elements, particularly moisture. Think of it as an unsung hero: It’s rarely seen, but it works tirelessly behind the scenes.
When moisture does find its way beneath the cedar shingles (be it from rain, snow, or dew), the underlayment ensures that it doesn’t penetrate the gazebo’s wooden structure. This dual defense system aids in preventing wood rot, mold, and water damage, thus securing your investment.
Cutting and Laying Underlayment
- Sizing It Right: Roll out the underlayment on a flat surface and cut it according to the dimensions of your gazebo’s roof, allowing a few extra inches on each side for overlap.
- Laying It Down: Start at the lowest edge of the roof, ensuring the underlayment lies flat without any wrinkles or bubbles. Each subsequent row should overlap the previous one by at least 2 inches (5 cm) to create a watertight seal. For the best results, make sure the underlayment covers the entire roof surface, extending to the very edges.
Nailing or Stapling Underlayment
Secure the underlayment in place using roofing nails or staples. Depending on your region’s typical weather conditions, you may want to place these every 12-18 inches (30-45 cm) apart. It’s essential to ensure the underlayment is flat and smooth during this process, eliminating any potential pockets that could trap water.
Step 5: Installing Drip Edge
If the underlayment is the unsung hero, then the drip edge is the reliable sidekick. This seemingly inconspicuous metal strip plays a pivotal role in safeguarding your gazebo from water damage. Let’s examine its role and learn how to install it effectively:
Purpose of Drip Edge
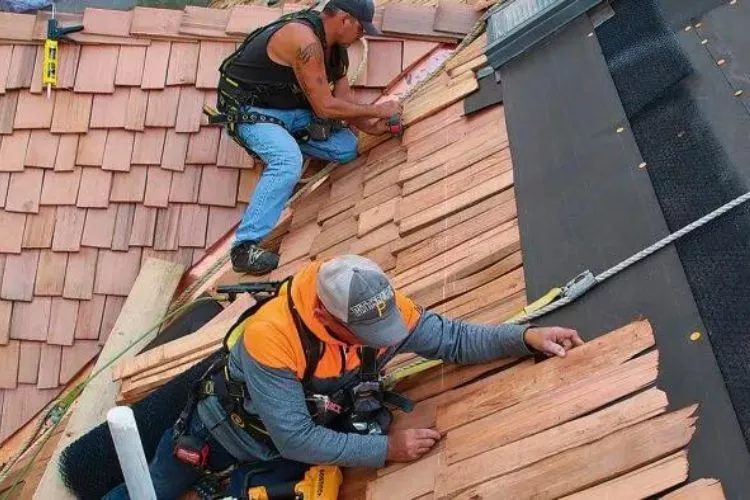
The drip edge is specifically designed to guide water off the roof and away from the underlying structure. Without it, water can wick back, sneak beneath the shingles, and potentially cause damage to the gazebo’s wooden structure or the foundation. Beyond this protective role, a drip edge also gives your gazebo a polished look, providing a clean line along the roof’s edge.
Measuring and Cutting the Drip Edge
- Size Matters: Measure the perimeter of your gazebo’s roof to determine the total length of drip edge you’ll need. Remember, it’s always better to have a little extra than fall short.
- Make the Cut: Using tin snips, cut the drip edge to the desired length. For the gazebo’s corners, you’ll want to cut the drip edge at a 45-degree angle to ensure a snug fit.
Attaching Drip Edge to the Roof Perimeter
- Starting Point: Begin installing the drip edge at one corner of the gazebo, ensuring it sits flush against the roof edge and over the underlayment.
- Secure It: Nail or staple the drip edge in place at intervals of 12 inches (30 cm). Make sure nails or staples penetrate through the drip edge, the underlayment, and into the gazebo’s wooden structure.
- Overlap Is Key: When you reach a corner or need to add a new piece, make sure to overlap the edges by at least 3 inches (7.5 cm) to maintain the barrier against water intrusion.
Step 6: Installing Cedar Shingles
Ah, the main event! Now that our groundwork is in place, it’s time to get into the meat of our project: installing those beautiful cedar shingles. The mere thought of layering these shingles might seem daunting, but by following some basic guidelines, we’ll make it feel like a breezy afternoon task. Let’s dive in.
Starting at the Bottom
This isn’t just a good life mantra; it’s fundamental for shingle installation. By beginning at the lowest point, we ensure proper overlap as we work our way up, crucial for water runoff.
- Row 1: Double up your first row. This foundational row (also called a starter course) should consist of two layers of shingles to ensure the gaps between shingles (in successive rows) don’t align and let water seep through.
- Move Up: As you add subsequent rows, ensure they overlap the previous row adequately, so no part of the underlayment is visible.
Shingle Orientation and Overlap
- Spacing: Cedar shingles expand and contract with changing weather. Thus, leave a space of about 1/8 inch (3mm) between them to allow for this natural movement.
- Overlap: Aim for at least a 5-inch (12.5 cm) overlap between shingle courses. This prevents water from finding its way beneath the shingles.
Nailing or Stapling Shingles
- Position: Drive two nails or staples about 1 inch (2.5 cm) above the shingle’s bottom edge and approximately 1 inch (2.5 cm) from each side. Ensure the fasteners don’t pierce the overlap from the shingle row below.
- Depth: Fasteners should penetrate at least 3/4 inch (1.9 cm) into the roof deck or just through if plywood is used.
Cutting Shingles for Edges and Valleys
- Edging: When you approach the roof’s edge, it’s unlikely your shingles will fit perfectly. Measure the gap and cut a shingle to fit snugly. Use a circular saw or roofing shears for precision.
- Valleys: Valleys are where two roof slopes meet and require extra attention. Lay shingles from one side over the valley center, marking where they intersect with the opposite slope. Cut along this line to create a clean overlap.
Step 7: Installing Ridge Cap
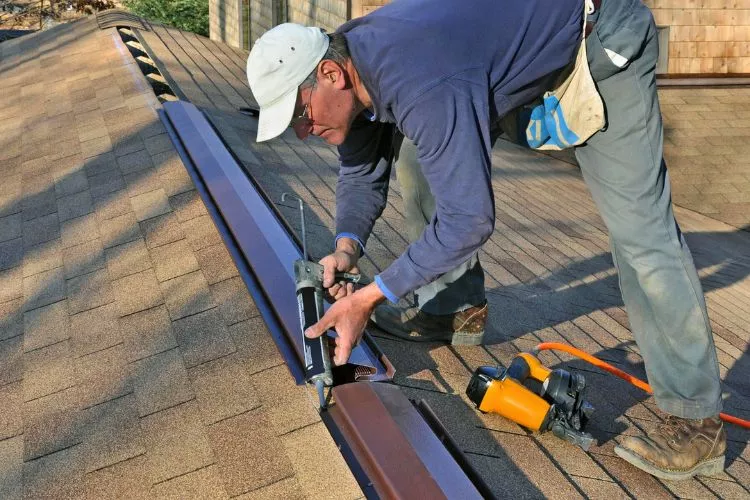
Alright, my friend, we’re almost at the pinnacle of our project – quite literally! The ridge cap isn’t just the “crown” of our gazebo; it plays an essential role in ensuring that rainwater doesn’t play spoilsport during your gazebo gatherings. Let’s roll up our sleeves and give our gazebo the regal finish it deserves.
Creating a Watertight Ridge
The ridge, being the highest point of our gazebo, is most vulnerable to water seepage, especially during heavy rainfalls. Therefore, it’s vital to ensure its watertightness. Here’s how:
- Overlap is Key: Begin on one end of the ridge and lay the first shingle perpendicular to the ridge line, ensuring it hangs equally on both sides.
- Secure It Right: Fasten it using two nails on each side, ensuring they’re positioned to be covered by the next shingle.
- Continue the Process: Place the next shingle such that it covers the nails of the previous one and continue this overlapping pattern all along the ridge. This ensures no nails are exposed to the elements.
Measuring, Cutting, and Installing Ridge Caps
- Preparation: First off, you’ll need ridge cap shingles. You can buy pre-cut ridge caps, or create your own by cutting regular shingles into three equal parts.
- Size Does Matter: For a typical cedar shingle, each piece should be around 12 inches (30.5 cm) wide post cutting. This size ensures adequate overlap and provides a neat appearance.
- Installation: Starting at one end of the ridge, nail the first cap in place, ensuring the thick end points towards the gazebo’s center. Subsequent pieces should overlap the preceding one, covering the nails and creating a watertight seal.
- Finishing Touch: Once you reach the opposite end, you might need to trim the last cap piece for a snug fit. Make sure to secure it well.
Step 8: Take Care of the Ventilation (Optional)
Now, let me let you in on a little secret that might just save your gazebo’s lifespan. Ventilation! It might sound optional, but trust me, it can make a world of difference. Let’s break it down.
Importance of Proper Ventilation
Have you ever experienced a stuffy room with poor air circulation? Unpleasant, right? Now, imagine that same scenario for your gazebo’s roof. Proper ventilation ensures:
- Regulation of Temperature: On those scorching summer days, heat can get trapped beneath your gazebo’s shingles, causing them to age faster. Good ventilation helps dissipate this heat.
- Prevention of Condensation: In colder months, the difference in temperature between the inside and outside of the gazebo can lead to condensation. Over time, this can result in mold growth, wood rot, and shingle damage.
- Increased Shingle Life: With reduced heat and moisture buildup, your cedar shingles are set to enjoy a longer, healthier life.
Installing Vents if Needed
If you’re convinced (as you should be!) about the importance of ventilation, here’s how to go about it:
- Choose Your Vent: There are multiple options available – ridge vents, soffit vents, and turbine vents, to name a few. Your choice would depend on your gazebo’s design and your personal preference.
- Placement is Crucial: Ideally, vents should be placed both at the base and at the peak of the roof, facilitating a natural flow of air – cold air enters from the base and hot air escapes from the top.
- Installation: Once you’ve marked your spots, cut the required openings ensuring they’re slightly smaller than the vent size. This guarantees a tight fit. Secure the vents in place as per the manufacturer’s guidelines.
Step 9: Final Inspections and Touch-Ups
The home stretch! We’re almost there. And just like any significant undertaking, our cedar shingle installation isn’t complete without a meticulous once-over. Think of this as the cherry on top, the final polish on a masterpiece. Let’s dive into the specifics.
Checking for Loose or Raised Shingles
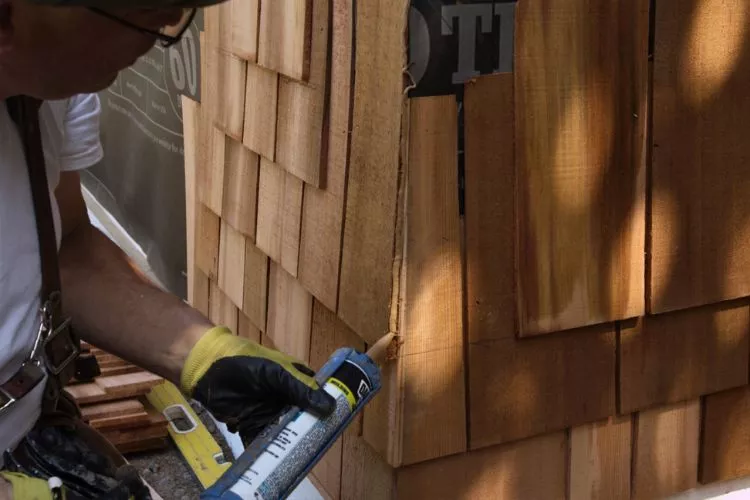
Take a walk around your gazebo and inspect the roof closely. You’ll want to ensure that all shingles are laying flat against the surface. If you spot any that seem raised or not firmly attached:
- Use a rubber mallet to gently tap them into place.
- If they remain loose, secure them with an additional nail or two, ensuring you don’t nail too close to the edge to avoid splitting.
Inspecting for Proper Alignment and Overlap
Consistency is key. Ensure:
- Shingle rows are straight and aligned properly.
- The overlapping of shingles is consistent throughout, which not only maintains aesthetics but also ensures the watertight integrity of the roof.
Ensuring All Nails are Properly Seated
We don’t want those shiny nail heads sticking out, do we?
- Check for nails that might be sticking up and tap them gently to ensure they’re flush against the shingle.
- However, be cautious! Nails driven in too deeply can cut into the shingle and reduce its lifespan.
Making Necessary Adjustments
It’s time to tweak and tune:
- If you notice any inconsistencies or errors, now’s the time to correct them.
- Should any shingles need replacement, use a flat bar to gently lift the surrounding shingles, remove the faulty one, and replace it with a new shingle. Nail it in place and ensure the surrounding shingles lay flat.
Pro Tips
Ah, the age-old wisdom that often separates the novices from the seasoned vets. These golden nuggets can make the difference between an okay job and a phenomenal one. Whether you’re a DIY enthusiast or a pro, these pro tips will serve you well when installing cedar shingles on your gazebo:
- Working in Dry Weather Conditions: Cedar shingles, like any wood, can expand when wet and shrink when dry. To ensure a smooth and hassle-free installation, always aim to work on sunny, dry days. Not only does it make the task easier, but it prevents the shingles from warping or becoming misshapen.
- Staggering Shingle Joints for a Better Appearance: To achieve a polished, professional look, ensure that the vertical joints between shingles are staggered from one row to the next. This not only enhances the overall appearance but also improves the roof’s water-shedding capability.
- Using Stainless Steel or Galvanized Nails for Longevity: Cedar contains natural preservatives that can corrode regular nails. By using stainless steel or galvanized nails, you ensure that they don’t rust or deteriorate over time, thus ensuring a longer lifespan for your shingles.
- Regular Maintenance to Extend Shingle Life: Just like any other part of your home, your cedar shingle roof benefits from regular check-ups. Clean off any debris or moss growth, check for any damage, and consider applying a protective sealant every few years to maintain its rich color and enhance durability.
Frequently Asked Questions (FAQs)
Can cedar shingles be installed over existing roofing?
Yes, cedar shingles can be installed over existing roofing, especially if it’s flat and in good condition. However, it’s often recommended to remove old roofing for the best results.
How much does it cost to install cedar shingles on a gazebo?
Costs vary based on region, gazebo size, and labor rates, but on average, expect between $400-$1,200 for materials and labor for a standard-sized gazebo.
How long can cedar shingles last on a gazebo?
With proper maintenance, cedar shingles can last 20-30 years on a gazebo. Factors like climate and upkeep play a role in their longevity.
Can I stain or paint cedar shingles for added protection?
Absolutely! Staining or painting cedar shingles can enhance their UV and moisture protection. Ensure you use products designed for cedar.
Are cedar shingles suitable for all climates?
Cedar shingles thrive in various climates due to their natural insulating properties and resistance to harsh weather. However, regular maintenance is crucial in very wet or sunny areas.
Conclusion:
In wrapping up, installing cedar shingles on a gazebo isn’t just about the aesthetic appeal, but also the robust functionality they offer. Remember the critical stages, from safety precautions to the finishing touches.
The natural allure and resilience of cedar shingles make them an outstanding choice for gazebos. So, DIY enthusiasts, muster up that confidence and embrace this project. We hope that this guide has been helpful. You can read about similar topics here on our website. Check back again soon for more.


